Congratulations on your purchase of Stoneform® from Hewn! We are thrilled to be a part of your flooring journey, and we want to ensure that your installation process is seamless and enjoyable. Before you embark on this exciting project, please take a moment to read through the following detailed instructions.
What is Stoneform®?
Stoneform® is a next-generation composite core flooring, comprised of nearly 70% limestone and 30% virgin PVC. Stoneform® is a sustainable, durable and waterproof choice for flooring, providing all the benefits of natural wood and stone flooring without the upkeep and hassle.
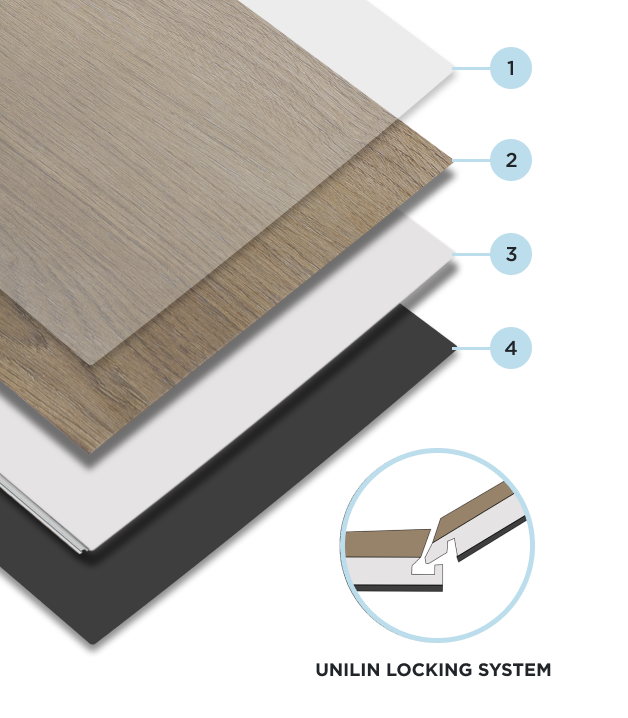
The wear layer is the top surface of Stoneform® that helps prevent scratches, dents, and wear-and-tear from reaching the core of the flooring. Our wear layer is comprised of a ceramic beads infused with acrylic lacquer to make it even more durable than other floors. Engineered to mimic the intricate patterns found in genuine wood, this print layer ensures a level of realism that stands unmatched in the industry.
Each individual plank within the Stoneform® collection boasts a distinct and authentic grain pattern, enhancing the natural look and feel of the flooring. What sets Stoneform® apart from conventional options is its innovative utilization of True Grain technology, offering a flooring experience that provides twice as many unique prints (18). Going beyond mere aesthetics, our commitment to excellence is evident in the print layer's quality, showcasing durability and longevity.
At the core of this revolutionary flooring is a proprietary stone composite, meticulously engineered to emulate the strength and resilience of natural stone. This composition ensures that every plank not only replicates the authentic textures found in wood but also stands resilient against the rigors of daily life.
Beneath it all, we use a 1.5MM IXPE underlayment, made of cutting-edge Irradiated Crosslinked Polyethylene, the newest advance in foam technology. IXPE is a closed-cell foam that is 100% waterproof, impervious to mildew, mold, rot, and bacteria. IXPE is an excellent insulator and has an outstanding IIC sound absorption rating of 60. This all helps Stoneform® feel warm underfoot and dampen sound.

1. CERAMIC BEAD INFUSED WEAR LAYER
30 mils of UV cured urethane with an added level of aluminum oxide to make it more scratch and dent resistant.2. DESIGN CURATED PRINT FILM
2x unique plank designs with our True Grain Technology, for fewer repeated patterns and a more natural wood look.3. PROPRIETARY STONE COMPOSITE CORE
Stoneform is a composite flooring made of nearly 70 percent limestone which makes it ultra-stable and durable.4. IXPE SOUND ABSORPTION PADDING
1.5 mm acoustical pad offers enhanced sound reduction and a more cushioned feel.
Legal Disclaimer and Limitation of Liability
IMPORTANT--READ BEFORE INSTALLATION
The following installation instructions are provided as a guide for customers choosing to install Stoneform® flooring. Any installation not performed strictly in accordance with one of the approved methods outlined in this guide is considered non-compliant and is undertaken at the installer’s own risk.
Improper installation may lead to personal injury, property damage, or product failure. Hewn, LLC and its affiliates, officers, employees, and agents expressly disclaim all liability for any damages, losses, or injuries resulting from installations that deviate from the approved methods or use materials or fasteners not specified herein.
This document does not constitute professional engineering advice. It is the responsibility of the installer or end user to ensure that all structural conditions, building codes, and local regulations are satisfied prior to installation.
Hewn, LLC makes no warranties, express or implied, including but not limited to warranties of merchantability or fitness for a particular purpose, relating to any installation method other than those expressly outlined and approved herein.
By proceeding with installation, you agree to assume all risks associated with any deviation from the approved instructions. Any modifications or alternate uses, including unapproved installation surfaces or techniques, void all manufacturer liability.
Ensure Your Warranty Coverage
*Follow These Critical Manufacturer's Installation Guidelines*
- Use transitions at exterior doors and thresholds: Stoneform® is a floating floor and needs room to expand and contract from season to season. No less than 1/4" expansion room.
- Your floor must be flat: Any area that has flooring deflection more than 3/16" in any 8' span will cause the locking system to fail.
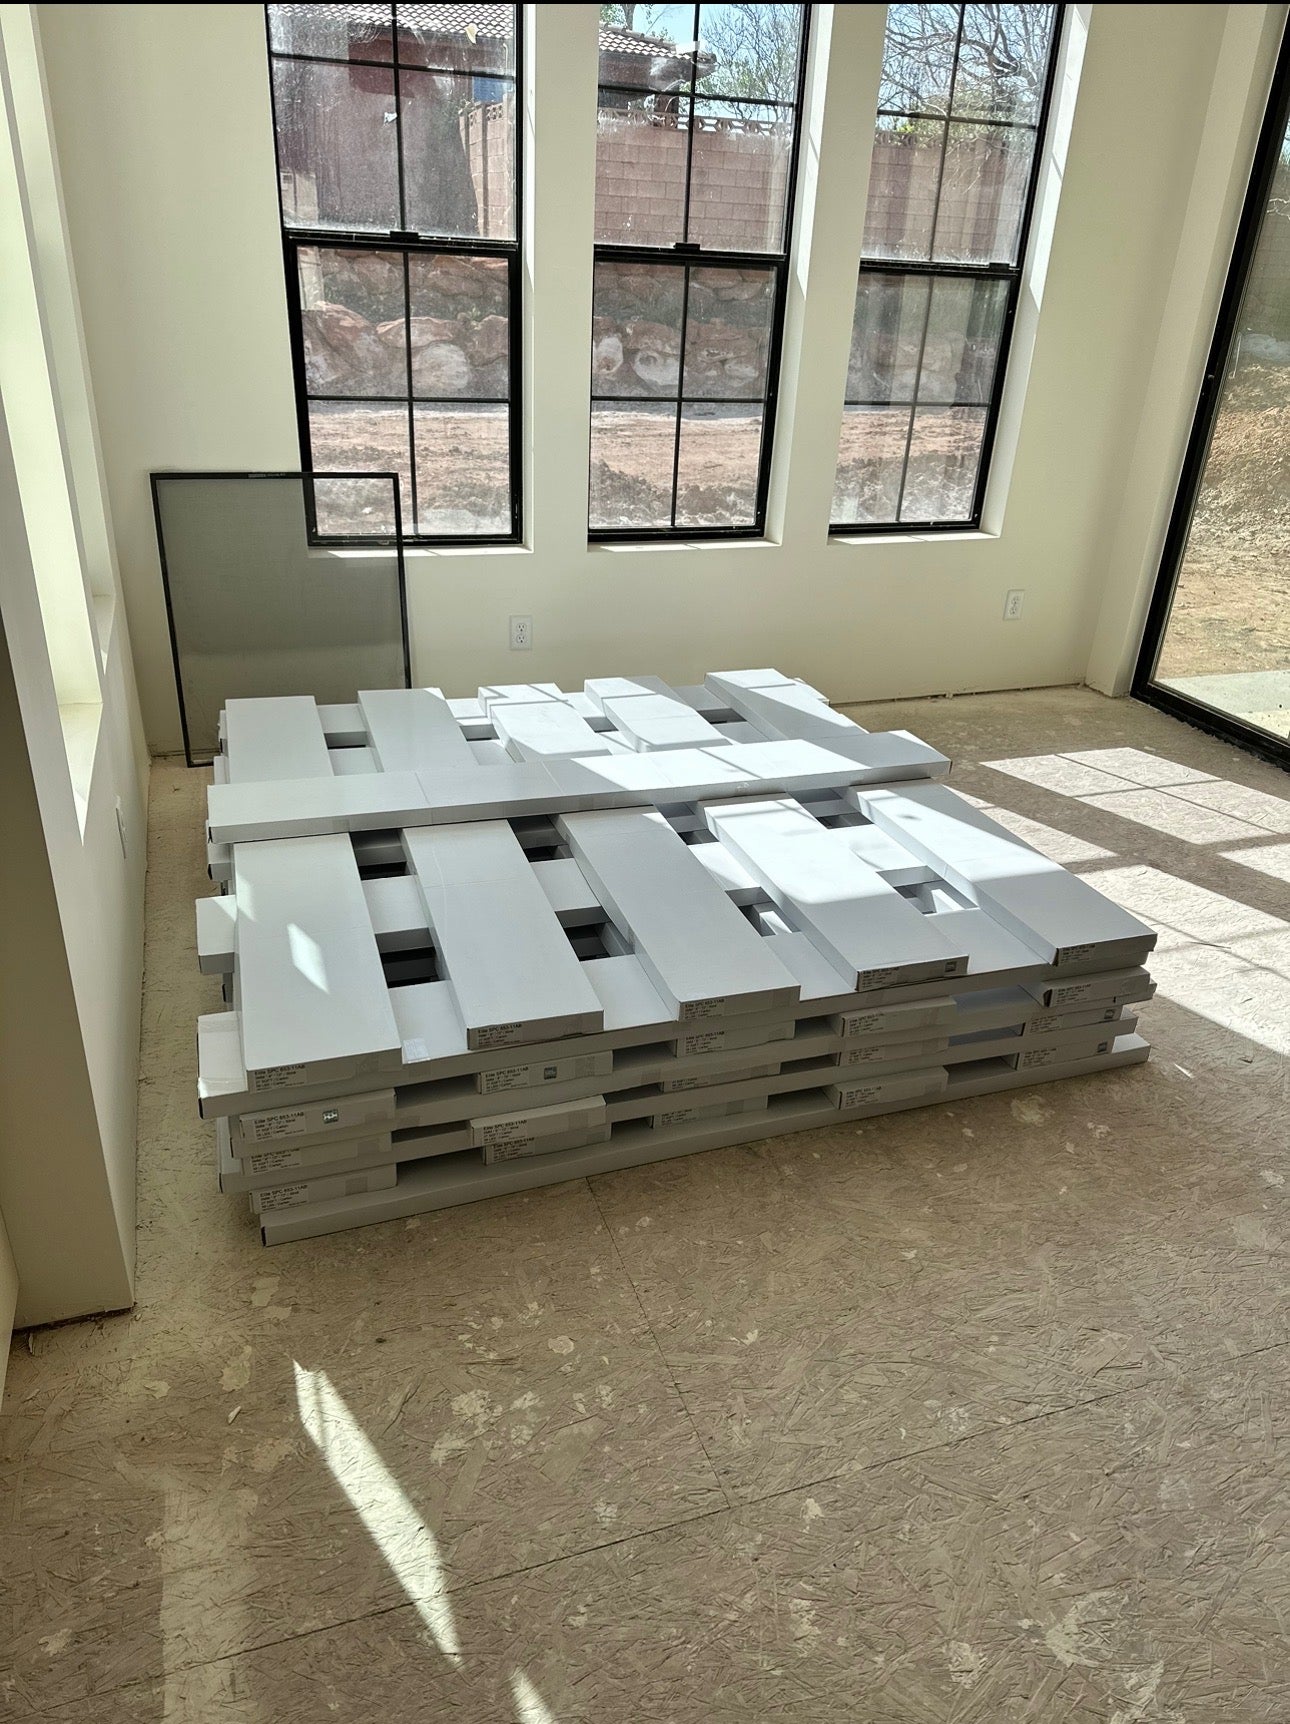
- Your flooring must be acclimated: Stoneform® should be acclimated onsite for at least 48 hours in a climate controlled environment where it is to be installed within recommended temperature and humidity requirements.
- Do not install cabinets on top of Stoneform®: Stoneform® must be allowed to float, expand, and contract throughout the seasons. A minimum of a 1/4" must be allowed where Stoneform® meets all immoveable vertical surfaces.
- Use a moisture barrier: If installing Stoneform® over concrete, a 6mil moisture barrier is required. Hydrostatic pressure from potential moisture in the concrete will cause the locking system of Stoneform® to fail.
- Do not install Stoneform® over hardwood: Moisture from the subfloor can be trapped in the hardwood and result in dangerous mold.
- Don't glue Stoneform® on anything besides stair treads and transition pieces.
- Don’t install over additional underlayment.
- Use of additional underlayment, such as Quiet Walk or Quick Step, is redundant, will void your warranty and could result in damage to the floor’s locking mechanism.
Tools Required
Pro Tip: Although Stoneform® can be installed using a score and snap method, the installation can be easier and faster with a saw and basic equipment. Our favorite tools are provided below.
- Miter Saw
- Table Saw
- Jigsaw
- Oscillating Multi-Tool
- Tape Measure
- T Square
- Universal Tapping Block
- Rubber Mallet
- Straight Edge
- 1/4" Spacers
- Moisture/Vapor Barrier (6mil thickness)
- Knee Pads
- Small Pry Bar
- 72"-96" Level
- Chalk Line or Laser Level
- LVP Cutter
- Large Pry Bar
- Pull Bar
- Razor Blade
- Sharpie or Pencil
- Protective Eye Googles
Guidelines
We recommend adhering to the following professional advice. In the event that you may not have opportunity to review the comprehensive instructions or view the accompanying videos, we suggest, at the very least, watching the installation video accessible via the following link:
Full Installation
General Install Instructions
Stoneform® should be exclusively installed indoors and never outdoors. Prior to installation, meticulously inspect all planks. If any defects are identified, please refrain from installation and promptly reach out to Hewn for assistance.

Here are some crucial guidelines:
- Acclimate the Stoneform® for 48 hours prior to installation at a climate between 65 - 80 degrees fahrenheit. it is important that the area being installed is at this temperature range indefinitely.
- Remove quarter round, baseboard molding, or cove base.
- Undercut doorway moldings to match the flooring thickness.
- Lay cartons flat to prevent damage to the click mechanism.
- For larger spaces exceeding 100 linear ft, use T-moldings to ensure stability.
- Open 2-3 boxes at a time during installation to mix planks for color uniformity.
- Leave a 1/4" expansion gap between Stoneform® and the walls around the perimeter of the room.
- Ensure the subfloor is flat to within 3/16" over 8 ft.

Pre-installation Preparation:
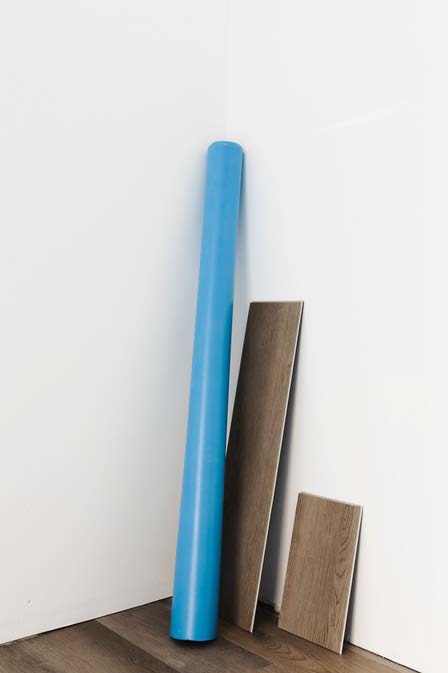
It is mandatory to use a vapor barrier with Stoneform® when installing directly over a concrete slab. Use a vapor barrier with a minimum thickness of 6mils. This barrier acts as a protective layer, preventing moisture from seeping up and causing damage to your new flooring. Although waterproof, Stoneform® is not a moisture barrier, so it's crucial to address any moisture issues in the subfloor before installation. A moisture barrier is not required if installing over tile.
Pro Tip: If your home has a crawl space, most of the time the moisture barrier is underneath the house to prevent moisture rising into your subfloor. If your crawl space does not have an existing moisture barrier, please install the moisture barrier in the crawl space before installation.
Subfloor Requirements
Pro Tip: Most problems with flooring installations are a result of poorly prepared subfloors. Unlevel or rough subfloors will create problems that will transfer to the floor. Prior to the installation of any flooring, verify that the subfloor meets the requirements listed in these instructions. Hewn is not responsible for flooring failure resulting from unsatisfactory job site and/or subfloor conditions.
Please follow the specific prep instructions for your subfloor.
Concrete: Stoneform® may be installed over on-grade, above-grade, or below grade concrete subfloors. Ensure moisture emissions do not exceed 5.0 lbs per 1000 sq. ft. for 24 hours and maintain a relative humidity below 85%.
Other requirements include:
- Hard, dense, and free from powder or flaking.
- New concrete slabs must be dry (at least 60 days) and fully cured.
- Fill holes, grooves, and expansion joints with Portland cement.
- Concrete floors with radiant heating systems are acceptable.
- Must have 1/4" expansion gap around all fixed, vertical surfaces.
Wood Subfloor: Stoneform® can be installed over sound wood underlayments. Follow the manufacturer's recommendations for underlayment fastening and ensure the wood subfloor is flat, dry, and sound.
Existing Subfloor: Stoneform® can be installed over various finished floors, including single-layer resilient sheet flooring, tile, ceramic, marble, and terrazzo. The surface must be in good condition with no signs of excessive moisture. Do not install over heavily cushioned floors or carpets.
Electric Heating Mats: Avoid using electric heating mats not embedded into the subfloor. This will void the warranty.
Radiant Heated Systems: Stoneform® is compatible with in-floor radiant heating systems, provided the subfloor temperature stays below 85°F. Gradually increase the temperature to desired settings.
Preparation Before Installing:
Pro Tip: Dry lay the floor before clicking planks together to finalize color layout and spot any installation pattern mistakes. The installer is responsible for setting expectations with the end-user.
Step 1: Commence installation from left to right, inserting spacers at ends and edges. Do not install cabinets or fixed objects on top of Stoneform®. Proper expansion space is essential, and door jambs should be undercut.
Step 2: Start installing with the tongue side against a wall (insert picture) and work your way down one row at a time. Lock the short end of the plank by inserting the tongue into the groove at an angle. Drop in place and continue to the end of the row.
Step 3: Use the leftover plank from the first row as a starter for the second row. Maintain at least 8” between plank end joints on adjacent rows. Plank joints should be randomized with a goal to not have joints line up with neighboring rows.
Step 4: Lock the long edge of the plank by inserting the tongue into the groove at an angle. Slide the plank toward the end of the previously installed plank until the tongue touches the groove. The flooring will sit flat on the floor when it is completely clicked together. Example
Step 5: Angle-Angle installation does not require the use a rubber mallet and tapping block. However, they can be used to ensure the planks are completely locked together. Any gaping can compromise the locking system. If the planks aren’t completely clicked together, separation can occur as time goes on.
Finishing the Installation:
- Remove spacers from the perimeter.
- Install transition moldings without fastening through the flooring.
- Pre-drill and install quarter round or baseboard molding, fastening into the wall.
- Use 3M Scotch-Blue™ 2080 Tape when adhering paper to the floor.
- Move furniture using an appliance hand truck over hardboard runways.
- Utilize felt protectors on furniture.
Special Installations:
Bathrooms: Stoneform® is 100% waterproof and ideal for bathrooms. Use 100% silicone caulking at ends, especially around bathtubs, toilets, or sinks.
Stairs: Install Stoneform® on stairs using Hewn provided stair nosings. Use 100% silicone construction adhesive on stairs to prevent movement. Glue will ONLY be used when installing on stairs and for transition pieces. Not at any other time during the installation should you use glue.
Stair Installation
Maintenance:
Pro Tip: Stoneform® should be regularly cleaned and maintained. Use a damp microfiber mop or rag to clean Stoneform®. If a cleaner is used, we recommend Bona Hard Surface Floor Cleaner.
- Regularly sweep and vacuum your floors to keep them dust-free.
- When moving heavy furniture, use Masonite panels for protection.
- Use felt protectors on furniture to reduce indentation.
- Be cautious with rolling casters to prevent floor damage.
- Place walk-off mats at entrances to minimize dirt.
- Do not wax the flooring or use "mop and shine" products.
- Absolutely no steam mopping.
- Stoneform® is highly scratch-resistant but not scratch-proof. All furniture that comes in direct contact with Stoneform® should have felt sliders between the furniture legs and the flooring. Care should be taken not to slide furniture across Stoneform®.
In Case of Flooding:
Pro Tip: Stoneform® is waterproof. Remove water promptly using a water pump, fans, and a dehumidifier. Ensure the room's moisture levels return to normal without drying below the previous level. If necessary, uninstall and reinstall the floor.
We hope these comprehensive instructions enhance your Stoneform® installation experience.
For any queries or concerns, reach out to Hewn's dedicated support team at (801)803-9878 or
customerservice@hewnfloor.com
