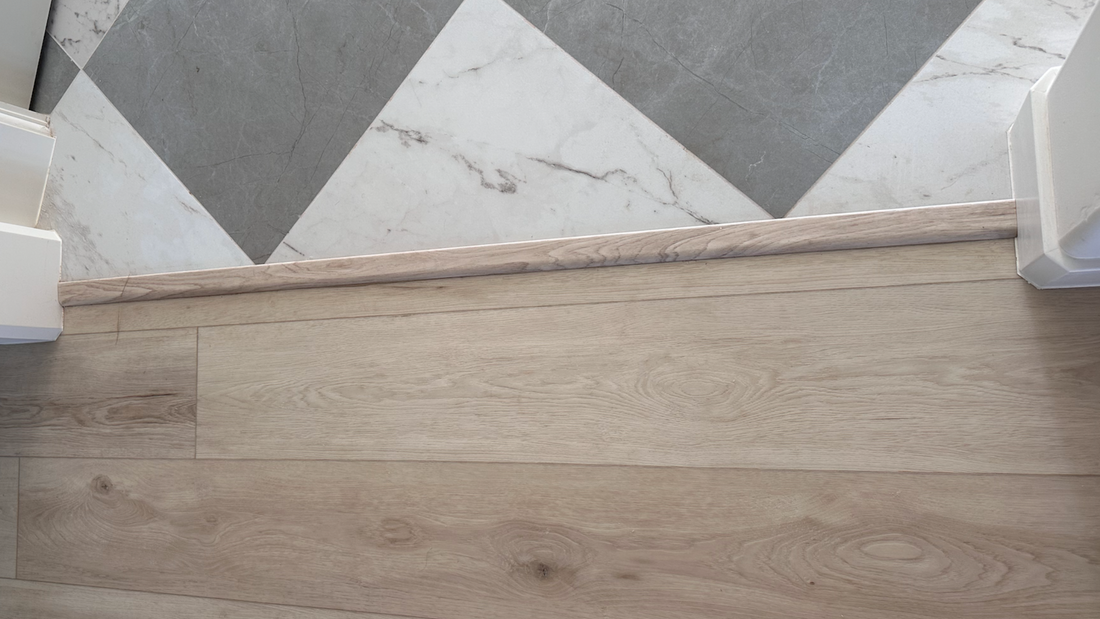
When starting a flooring installation, whether as a DIY project or by a professional, it’s essential to understand all the key elements that contribute to the overall look. One often-overlooked element is the reducer transition piece.
At Hewn, we offer a versatile Reducer Floor Trim Transition Piece that works seamlessly with all Stoneform® products. Let’s explore what a reducer is, why it’s essential, where to install it, and how to go about installing this practical trim.
What is a Reducer Transition Piece?
A reducer transition piece, commonly known as a flooring reducer, is a type of molding used to bridge the height difference between two different flooring surfaces. If you’re transitioning from a Stoneform® to a thinner surface such as vinyl, tile, or concrete, a reducer ensures a smooth, gradual slope rather than an abrupt step. This helps prevent tripping hazards and creates a clean, professional look in your space.
Our Hewn Reducer Floor Trim Transition Pieces come in 94” pieces and you can easily cut to the exact size you need. These pieces are designed to work universally with all of our Stoneform® flooring options, ensuring a perfect fit no matter your choice of collection or color.
Why Would You Need a Reducer Transition?
Smooth Transitions: A reducer transition piece allows for a seamless connection between different flooring heights, preventing the awkward or unsafe situation of stepping up or down abruptly.
Safety: By providing a gradual transition, reducers help reduce the risk of trips and falls, making your home safer for everyone, especially in high-traffic areas or homes with children or elderly family members.
Aesthetic Appeal: Besides the functional benefits, reducers contribute to the overall aesthetic of your space by creating a polished and cohesive look.
Protects Edges: The reducer also helps to protect the edges of your flooring from damage, wear, and tear that can occur over time when two flooring types meet without proper transitions.
Where Should You Install a Reducer Transition Piece?
Reducers are installed in places where Stoneform® meets a flooring surface that is built of a lesser thickness. Common area include:
Doorways: Transitioning between rooms where different types of flooring are used.
Hallways: When one end of a hallway has different flooring.
Open Plan Spaces: To separate areas with distinct functions, such as transitioning from a kitchen’s tile floor to the living room’s Stoneform® planks.
Around Stairs: For areas leading up to or down from steps where floor height may vary.
How to Install a Reducer Transition Piece
Installing a reducer transition piece is a straightforward process that can be tackled as a DIY project or left to your flooring installer. Here’s a simple step-by-step guide:
- Measure and Cut: Start by measuring the length of the area where you are going to install the reducer transition. Our reducer comes in 94” length pieces, so cut the piece to the appropriate size using a miter saw.
- Prepare the Area: Clean and dry the subfloor where you’ll be installing the reducer. Ensure both flooring surfaces are level and secure in installation.
- Position the Reducer: Place the reducer in the transition space, checking that it fits snugly and provides a smooth slope between the two flooring types.
- Adhere the Reducer: Apply 100% silicone caulk to the back of the reducer, then press it firmly into place. Allow at least 24 hours for the caulk to fully dry before walking on the newly installed transition piece. For added security, you can use painter's tape on top of the reducer to hold it in place while it dries.
If you’re installing Stoneform® and need a Reducer transition piece, order one today from Hewn. Don't let uneven flooring transitions compromise the look and safety of your space. Our reducers are designed to work with all Stoneform® flooring products as we have a reducer for each of our color options.

